Hello!
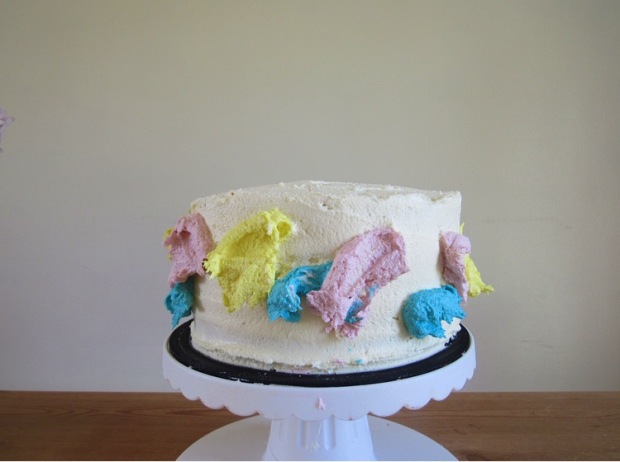
Today I wanted to do something to reflect this amazing weather so I made this bright watercolour cake. Surprisingly it’s not that hard to get a pretty finish, you just have to be careful about what colours you use so they don’t all mix together. You also have to be quite careful about how much you ‘spread’ the colours, I only went round the side with my palette knife twice. I do like how it turned out, although I always forget how intense my food colourings are (I use Americolour) so next time I would do it with some softer, pastel colours!
Enjoy!
Ingredients
Your favourite layer cake-I did 4 layers of my vanilla sponge which is as follows:
- 350g Margarine
- 350g Caster Sugar
- 4 Eggs
- 350g Self Raising Flour
- 2 tsp. Vanilla Extract
Buttercream:
- 300g Margarine
- 650g Icing Sugar
- Food Colourings of your choice
Method
- Cream together the margarine and sugar until fluffy
- Gradually add the eggs/vanilla
- Fold in the self raising flour
- Pour mixture into greased tins
- Bake at 180 degrees for 25 minutes
- For the buttercream, beat the margarine for about 5 minutes
- Add the icing sugar in 2 batches, mixing thoroughly in between each
- Stack the cakes with buttercream in between each

9. Spread the buttercream around the edge of the cake and chill for about 10 minutes (it doesn’t have to be neat, this is just a ‘crumb coat’)

10. Do a second neater coat of buttercream (using palette knife and a turn table helps a lot!)
11. Colour the remaining buttercream in your chosen colours
12. Add blobs of each colour randomly around the cake (don’t be afraid to add a lot, you scrape most of it off anyway)

13. Using a palette knife held vertically spread the colours around the cake, carefully and lightly, add more colour if necessary. After each swipe, make sure you clean your palette knife so the colours don’t mix too much.


Yet again a masterpiece xx
LikeLiked by 1 person
I love how you did the colored frosting! Great job 🙂
LikeLiked by 1 person