Marble Biscuits

Hey,

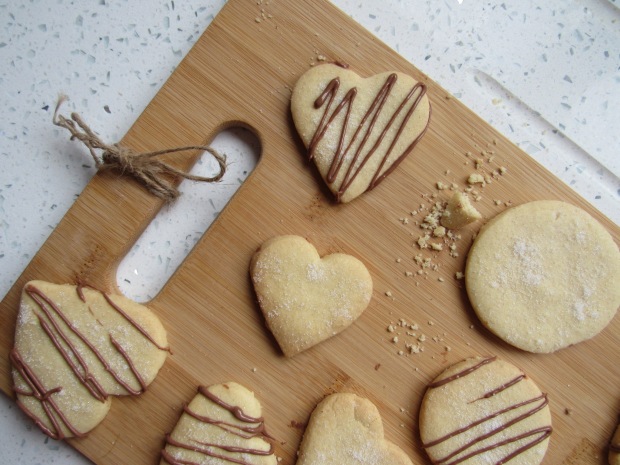
I saw this idea on Pinterest and loved it so much that I had to give it a go myself. I am actually really impressed with how they turned out, I think they look so cute! The only thing I’d do next time is make the icing a tiny bit thinner as when I lifted the biscuit out of it, it left quite a thick layer and bits were uneven. They’re fun to make and you could make them to suit any occasion by switching the colours, I’ll definitely be making them again.

Ingredients:

Biscuit:

  • Your favourite biscuit recipe (I used my shortbread recipe and made the biscuits slightly thicker so that they were easier to dip in the icing)

Icing:

  • 2 tsp. Egg White Powder
  • 5 tbsp. Water
  • 250g Icing Sugar
  • Food Colouring

Method:

  1. Bake your biscuits and leave them to cool completely
  2. For the icing, start by mixing the egg white powder with 2 tbsp. of water, leave to sit for about 5 minutes
  3. Sift your icing sugar into a bowl along with the egg white powder/water mixture
  4. (Using an electric mixer with a whisk attachment) Whisk the icing sugar and egg white/ water mixture until it clumps together
  5. Add the remaining water bit by bit until you reach a smooth consistency
  6. Keep this whisking for about 5 minutes and add a little more water if you feel it needs it (you need to be able to dip your biscuits into it without it all just running straight off again)
  7. Add a couple of drops of food colouring into the icing and using a skewer lightly swirl the colour so that I creates a marble effect (try not to be too heavy handed otherwise it’ll just dye all the icing one colour)
  8. Then just dip your biscuits into the icing and slightly twist before you bring it back out.
  9. Tap the biscuit lightly on the worktop to even out the icing.2729

Watercolour Cake

Hello!

Today I wanted to do something to reflect this amazing weather so I made this bright watercolour cake. Surprisingly it’s not that hard to get a pretty finish, you just have to be careful about what colours you use so they don’t all mix together. You also have to be quite careful about how much you ‘spread’ the colours, I only went round the side with my palette knife twice. I do like how it turned out, although I always forget how intense my food colourings are (I use Americolour) so next time I would do it with some softer, pastel colours!

Enjoy!

Ingredients
Your favourite layer cake-I did 4 layers of my vanilla sponge which is as follows:

  • 350g Margarine
  • 350g Caster Sugar
  • 4 Eggs
  • 350g Self Raising Flour
  • 2 tsp. Vanilla Extract

Buttercream:

  • 300g Margarine
  • 650g Icing Sugar
  • Food Colourings of your choice

Method

  1. Cream together the margarine and sugar until fluffy
  2. Gradually add the eggs/vanilla
  3. Fold in the self raising flour
  4. Pour mixture into greased tins
  5. Bake at 180 degrees for 25 minutes
  6. For the buttercream, beat the margarine for about 5 minutes
  7. Add the icing sugar in 2 batches, mixing thoroughly in between each
  8. Stack the cakes with buttercream in between each 21.jpg

9. Spread the buttercream around the edge of the cake and chill for about 10 minutes (it doesn’t have to be neat, this is just a ‘crumb coat’)

22.jpg
10. Do a second neater coat of buttercream (using palette knife and a turn table helps a lot!)
11. Colour the remaining buttercream in your chosen colours
12. Add blobs of each colour randomly around the cake (don’t be afraid to add a lot, you scrape most of it off anyway)

23.jpg
13. Using a palette knife held vertically spread the colours around the cake, carefully and lightly, add more colour if necessary. After each swipe, make sure you clean your palette knife so the colours don’t mix too much.

2426


Millionaire Cupcakes 

Hey,

Uni has been (and still is) a bit crazy at the minute with assignments and exams to revise for but I wanted to take some time to do a new recipe. I had some left over shortbread dough and didn’t want to waste it so I thought I’d add it into a cupcake again (similar to my cornflake tart cupcakes). This time though I thought I’d be a bit fancy and add chocolate and caramel to replicate a millionaire shortbread and they turned out v tasty. I went a bit over the top with the decoration but I couldn’t not add the little bronze sprinkles because they fit the ‘millionaire’ theme so well! (They look and taste just as good without them though)

Enjoy!

Ingredients:

  • Shortbread dough (first recipe on my blog)

Cupcakes:

  • 125g Caste Sugar
  • 125g Margarine
  • 3 Eggs (beaten)
  • 125g Self Raising Flour
  • 25g Cocoa Powder

Caramel Buttecream:

  • 150g Margarine
  • 350g Icing Sugar
  • 150g Caramel (I used the ready made, canned type)

Method:

  1. Roll out your shortbread and cut out 12 little circles, place them in the cupcake casesimg_2586
  2. Cream together your margarine and sugar until fluffy
  3. Slowly add your eggs bit by bit (don’t worry if it looks like it’s curdled, it’ll be fine once you add the flour)
  4. Stir in the flour/ cocoa powder
  5. Put about 2 tbsp of the mixture in each cupcake caseimg_2587
  6. Bake for 20 minutes at 180 degrees
  7. For the buttercream, cream the margarine for about 3 minutes until soft
  8. Stir in the icing sugar and beat for a further 3 minutes
  9. Add in the caramel, mix to combineimg_2585
  10. Spread the buttercream on top and decorate however you fancy (I made some little shortbread biscuits to crumble on top)

18

Shortbread Biscuits

img_0956

Hello!

Thank you for taking the time to have a look at my first blog post, it’s only short but I hope you’ll enjoy reading it as much as I have I enjoyed making it. 

I wanted to start this blog after finding a bit of time between studying at University (Nottingham Trent doing Food Science and Technology) and my little job at a local gymnastics club.

My main passion is baking (as well as watching ice hockey, an interesting mix I know), my grandma was the one who got me into it when I was young. The love of baking with her has now turned into me doing a degree in Food and the ambition of owning my own bakery one day.

I thought I’d start with one of my favourite recipes, they’re pretty easy to make but they taste so good, it’s my Grandmas recipe for Shortbread biscuits. I don’t know what it is about these but I never get sick of them, they’re one of those biscuits where you can’t just have one without going back for more.

Enjoy!

Ingredients:

  • 8oz (about 225g) Margarine (I use stork)
  • 4oz (about 110g) Caster Sugar- and a little bit more for dusting.
  • 8oz (about 225g) Plain Flour
  • 4oz (about 110g) Corn Flour
  • 2oz (about 55g) Chocolate (optional)

Method:

  1. Cream together the margarine and sugar
  2. Stir in both flours until combined (don’t over mix otherwise the biscuits won’t be as crisp)
  3. Roll the dough out (its quite a soft dough, make sure there’s a decent amount of flour on the work surface). I like these a bit thicker than normal biscuits so I don’t roll it out too thin, I also find it easier to roll the dough out in two batches.
  4. Cut out whatever shape you fancy, they hold their shape pretty well
  5. Bake for 20 minutes at a preheated oven of 180 degrees, once they’re out (and still hot) sprinkle with caster sugar
  6. You could leave them as they are, but I like to drizzle some chocolate on top because why not!img_0960